System overhaul, pretty much new everything
Posted: Sun Oct 19, 2008 12:55 pm
**apologies for the size of the pictures, I had this formatted for html and haven't had chance to resize everything. I'll do it when I get two minutes to rub together**
Well the time had come for a refresh of my system. I'd managed to keep
pretty consistent with the spec for over a year which is good going by
my usual standards, but my CPU was feeling decidedly underpowered and
my motherboard wasn't capable of overclocking without overheating the
northbridge, so I figured I'd take the opportunity to do a proper
overhaul.
First decision was the case as the layout of that would determine what
sort of cooling setup I'd be going for, I very nearly bought a
Coolermaster CM690, then a Lian Li A-05, but in the end I went with an
Antec 300, mainly because of the price, but also because I've had Antec
cases before and had no issues with them.
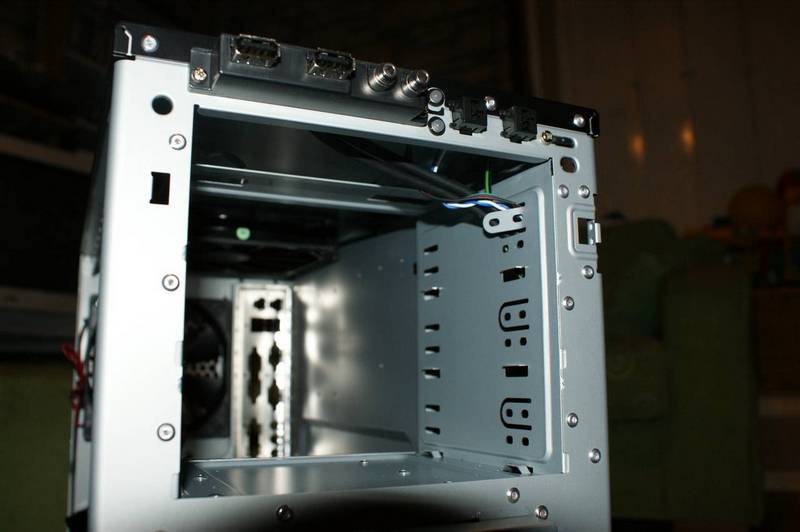
The Antec is pretty good, has a nice overall layout for an aircooling
setup and is spacious enough for all but the most extreme builds, but
the cable routing options are pretty poor. By default the USB,
power/reset and front audio ports have their wires just routed over the
top of the 5.25" cage and dangling into the main chamber of the case.
Obviously this is no good, but the 5.25" bay is affixed to the roof, so
you can't merely push them out to the right hand side. I took the lazy
option of just bending one of the drive bay fixing brackets. I'll only
ever need one optical drive anyway and I wanted a clean fascia so it
won't interfere with anything.
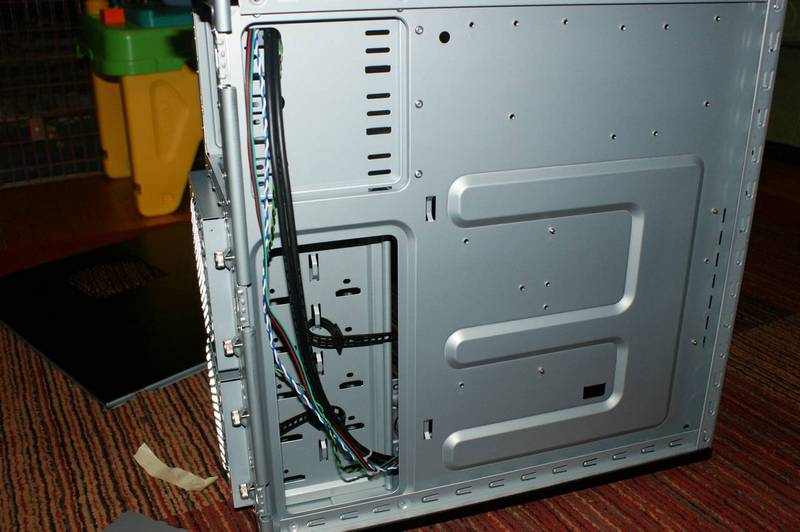
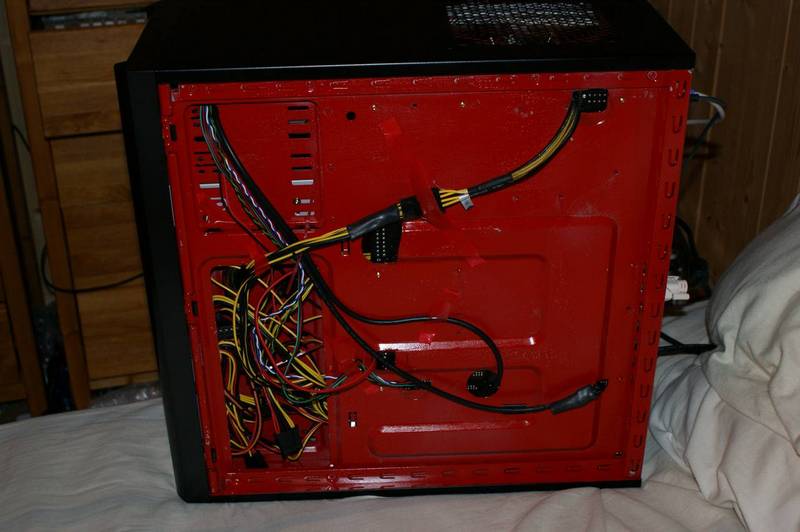
That makes the case look a little better. If you take a look
at the next photo you'll see that the 5.25" bays are affixed to the
motherboard tray. This isn't a big deal in itself and lends some
solidity to the case, but it does affect cable routing options to any
optical drives. More on this later.
Next step was to remove the stock fans, they were okay but
since I already had a couple of better Yate Loons and a Scythe in the
house they couldn't compete. I also removed the 14cm fan in the roof.
My plan was to have as few fans in the build as possible, and couldn't
see the need for this one - I figure having a whacking great hole in
the roof would be sufficient for convection to do a sufficient cooling
job.
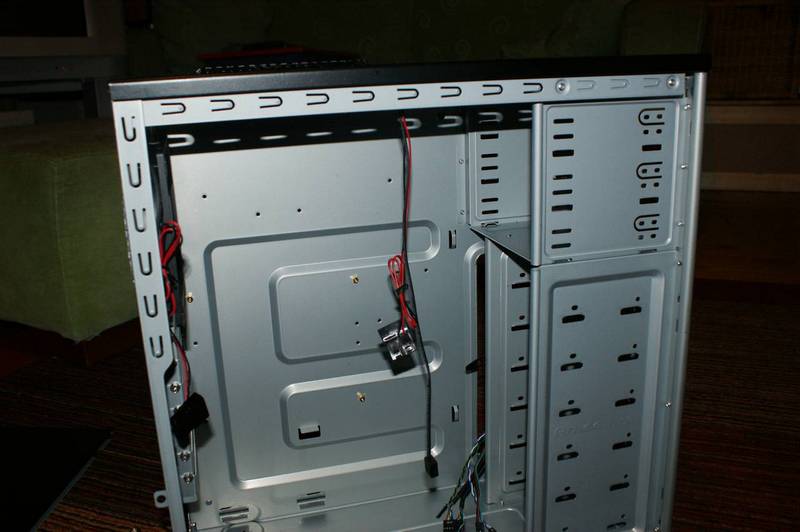
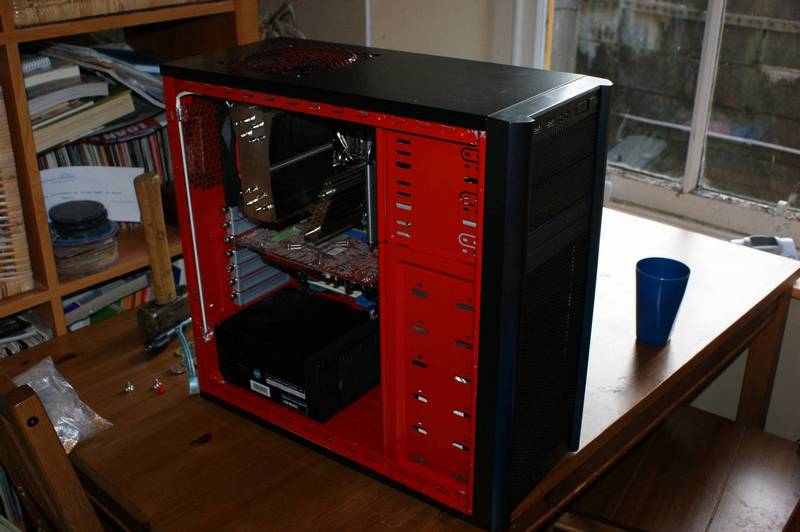
Once that was done I did a test fit of my motherboard, marked
up and cut some holes in the motherboard tray to help with cable
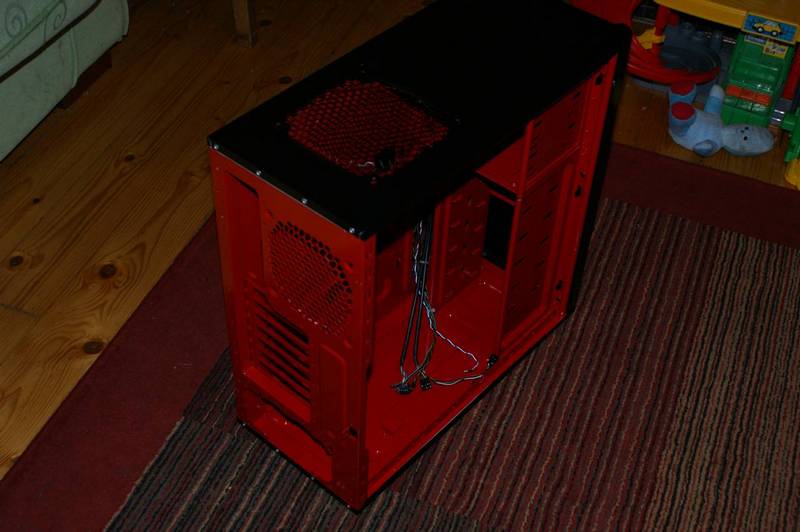
routing, and then I painted the chassis. I couldn't make up my mind
what colour to go for but in the end I decided to go with red. The
'theme' for the build was always going to incorporate black and red
because of the colour of my chosen motherboard and my Radeon graphics
cards. I was going to go for all-black, but then I bought some OCZ
ReaperX memory with the comedy oversized silver heatsinks, so I decided
to keep a silver theme to the cooling components instead of black. So
Silver, Red and Black was the final choice. It looks a bit garish at
first, but with both side panels and the front fascia on it doesn't
show through, so the effect is actually quite subtle (unless I fit a
window!)
Now onto the components. I got an Asus P5K-E wifi/AP
motherboard on clearance from dabs for just £32, which was a
steal as it's pretty much the ideal choice of motherboard for my needs
and the price was just too good to pass up. As previously stated I got
some OCZ ReaperX, it's the PC6400 stuff but I bought it as I needed it
in a hurry because my other ram corrupted and this was the only decent
stuff I could get locally. I read up on it online and all the reviews
and opinions said it'd run to 1000Mhz easily and as it turned out it
does so I'm really pleased with that purchase. Most other components
I'd be keeping from my old system - DVD, HDs, Phantom 500 and a pair of HD3850s.
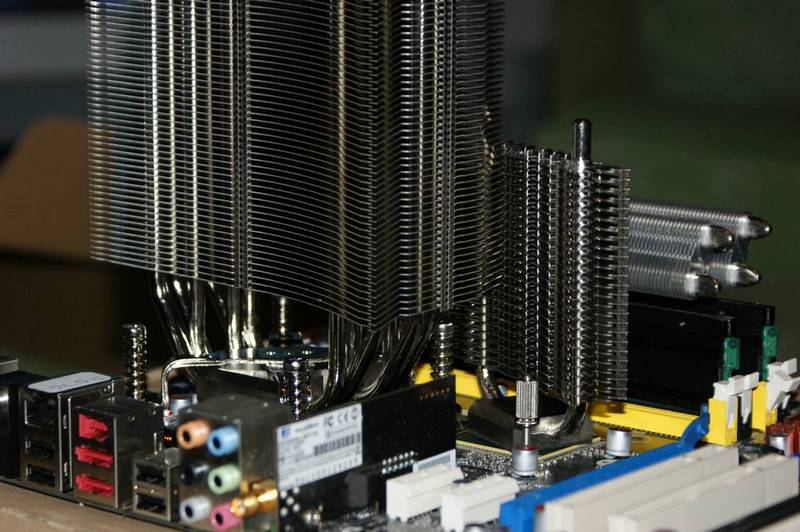
Initially I was planning to transfer my Scythe Infinity, but
fitting it with a Thermalright bolt-through kit was an absolute
nightmare and due to the positioning of a couple of capacitors it'd
only fit onto the board in one orientation, which affected my
northrbridge heatsink (HR-05) and that in turn blocked the first ram
slot, so I went and bought a Thermalright Ultra120 Extreme, along with
a Xilence 120mm fan from ebuyer - the mounting bolts for the bolt
through kit still interfered with my northbridge heatsink, but as it's
a single central point of pressure for the mounting system, I was able
to angle it and still get good cooling.
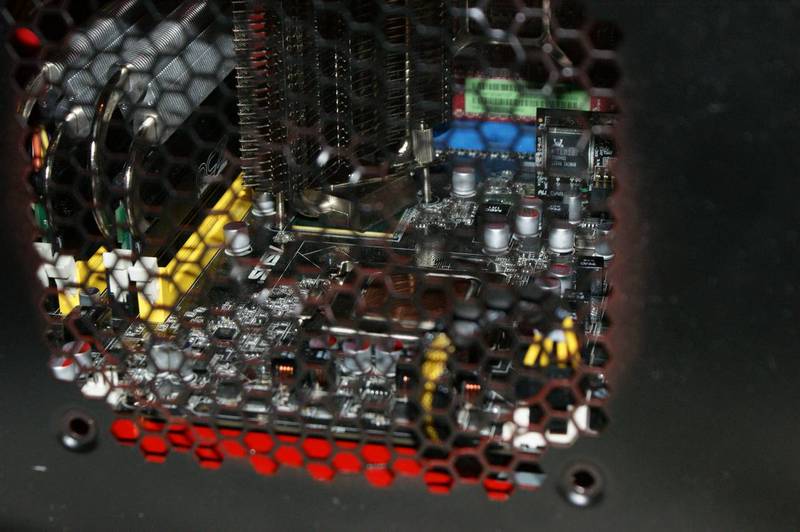
Ignore the fan cable, this was just for testing purposes and it was
later shortened and sleeved.
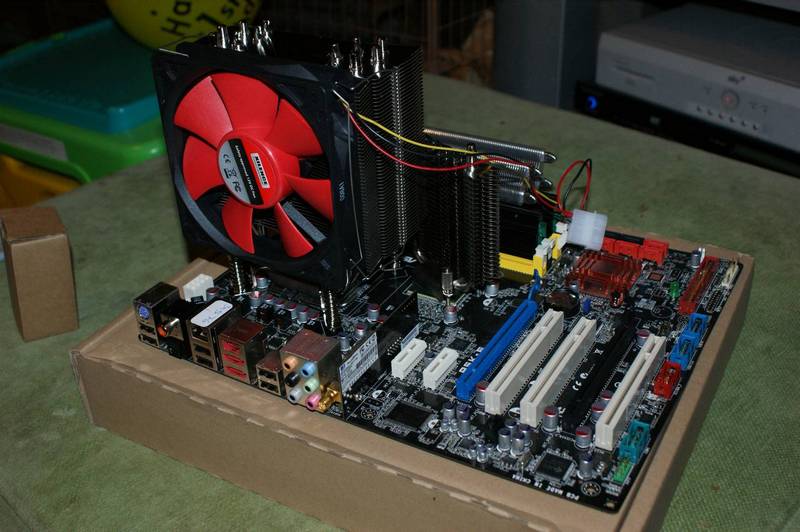
Then it was time to start building.
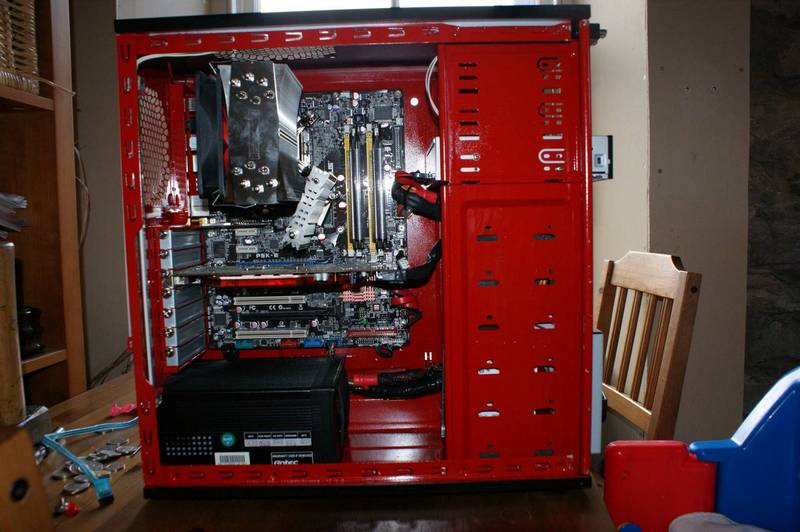
First step with all major components in, but not cabled;
Next step was to get the cables in. Note that I put the
optical drive in the lowest bay, this was to minimise visible wiring
because I had to put all the cables under the 5.25" bays as previously
indicated - this was a bad point, but in a way it worked for me because
I'd tried routing the ATX cable through from the back of the board, but
it looked worse than having it come from behind the HD bays, so I just
folded the sata and power cables for the optical drive and cable tied
them to it. It's not super-neat, but it's an efficient use of space and
the best looking solution that I could get without making further cuts
to the case.
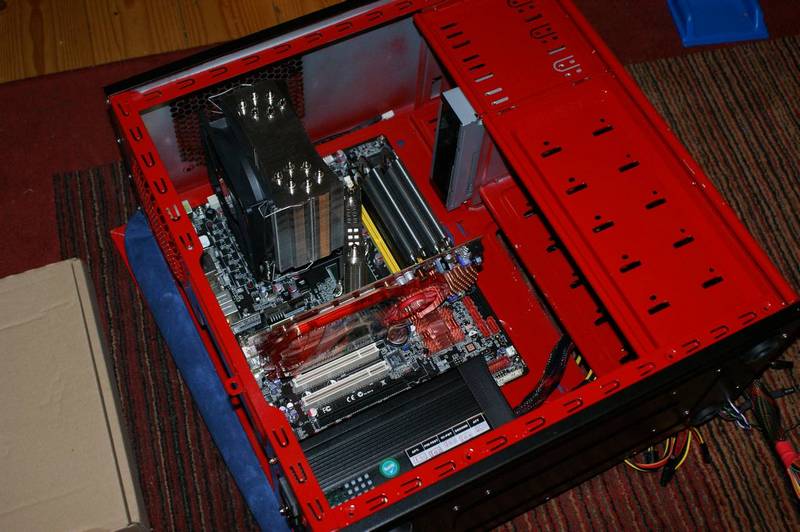
Next step was just a bit of tidying. Sleeving the PCI-E cable,
cable tying the PSU cables together and I also had to buy an 8-pin
power extension cable. I had tried routing the existing cable up behind
the motherboard, but the little visible section at the bottom of the
case was ugly, so I paid a couple of quid for an extension to keep
things neat looking at the front.
Then I received my new CPU - A Q9250. Yes, I typed that correctly, it's
a 12Mb 45nm Yorkfield quad core, but it's an Engineering Sample with a
low 6-7x multiplier. I bought it off ebay with a dodgy description, I
thought I was getting a Q9450, but this is capable of running 3.15Ghz
with a relatively low 1.2vcore, so I'm not too bothered. Fitting it was
a doddle because the TRUE is so thin. I didn't even need to take
anything out of the case, I just used a long screwdriver and got it in
easily.
Oh yes, it's lapped too.
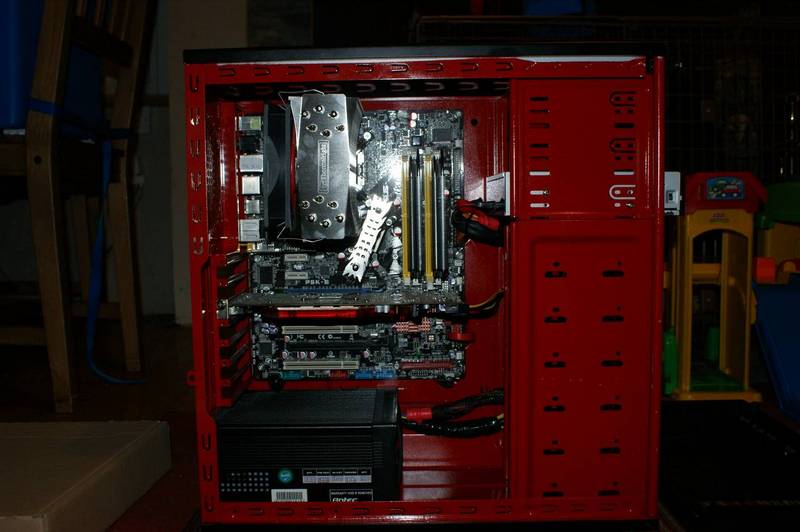
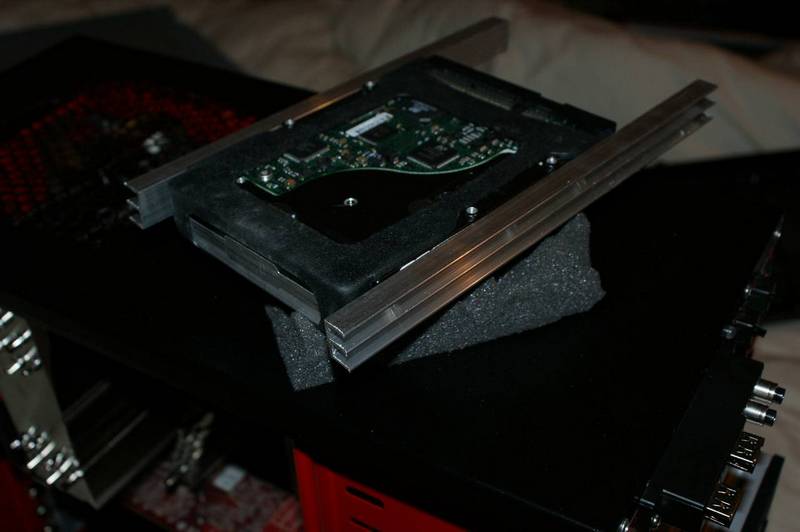
The final step was the hard discs. I used an amalgamation of techniques
gleaned from SPCR and bought a length of W-section aluminium tubing
from B&Q (£4 btw) and cut it into lengths, drilled screwholes and fitted them onto my HDs to act as heatsinks, then soft mounted them on foam, wedging them into the space of the 3.5" bays with an interference fit to keep them steady. Results are impressive. They're easily as quiet as in my old setup where they were fully suspended with elastic, and temps are a good bit lower as well.
Note the switch for the cathode lights mounted low on the right hand side of the front bezel. Nicely tucked out of the way.
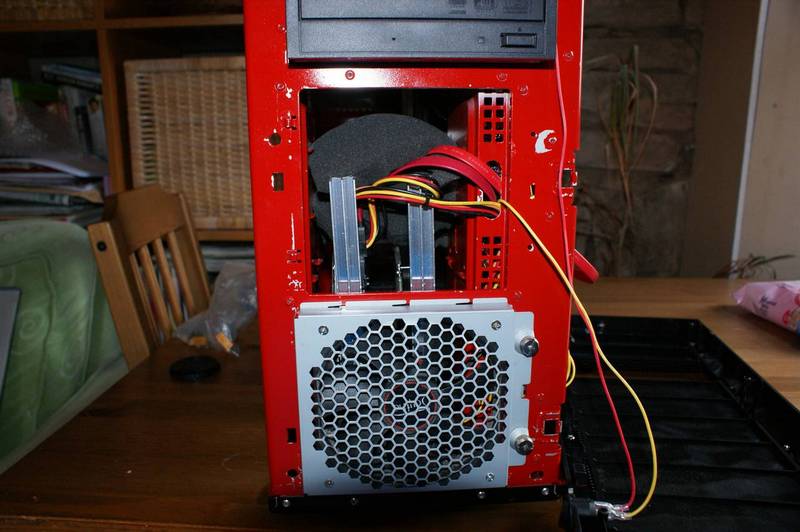
Final touches - I fitted a Scythe into the front intake position to feed cold air to the HDs, I had the Xilence mounted on the TRUE, and after some initial testing I fitted a Yate Loon into the side panel mount as the Phantom was getting too hot for comfort, so that's acting as an exhaust for the PSU and that keeps overall system temps down by nearly 10°C. All fans are running off the mobo headers, and I also have a Zalman resistor on the Yate Loon. All speeds are at their minimums.
My intention with this build wasn't silence, I've had 2 totally passive
systems in the past and I've come to the realisation that I don't
object to some gentle noise with my computing if it means temps are
kept down. I kept the stock coolers on my Radeons anyway so it would
have been pointless having the rest of the system running fanless.
Three 120mm fans might seem excessive by SPCR standards, but I
experimented with removing the front intake Scythe and it made very
little difference to overall noise levels so I put it back in for the
sake of reliability and longevity. I managed to kill one of my
Spinpoints last year and I put it down to excessive temps (pure
speculation, but I can't see any other reason for it other than pure
bad luck) so this time I want HD temps as low as possible.
In summary I'm very pleased with the way it's turned out. It's
certainly the neatest build I've ever done, and the only things I don't
like about it are the sleeving for the PCI-E and SATA cables as I
wasn't patient enough to braid them, but if it annoys me enough I can
always redo them at a later date. The HD mounts don't look too good,
but aside from this thread nobody's going to see them apart from me, so
I'm willing to live with it for now. In time I might source some denser
foam (camera foam on ebay is pretty cheap) and do a neater job, but the
waffle foam I've used is perfectly secure and from a side view it's not
visible anyway. The system is significantly more powerful than my old
setup, everything runs cooler and it's just as quiet when not idling, so
overall the work was a success.
Still to do is a side window. I put two red cathodes into the
case in readiness, but I'm going to get a light activated mirror panel
and cut it to shape around the side vent, so I'll need to take my time
on that one to keep things neat and not mess up the good work I've
already done. I also need to refit my second graphics card, it's
currently in service on my second PC, so when I get around to replacing
it I'll reinstall it into this build. No rush though.
Well the time had come for a refresh of my system. I'd managed to keep
pretty consistent with the spec for over a year which is good going by
my usual standards, but my CPU was feeling decidedly underpowered and
my motherboard wasn't capable of overclocking without overheating the
northbridge, so I figured I'd take the opportunity to do a proper
overhaul.
First decision was the case as the layout of that would determine what
sort of cooling setup I'd be going for, I very nearly bought a
Coolermaster CM690, then a Lian Li A-05, but in the end I went with an
Antec 300, mainly because of the price, but also because I've had Antec
cases before and had no issues with them.
The Antec is pretty good, has a nice overall layout for an aircooling
setup and is spacious enough for all but the most extreme builds, but
the cable routing options are pretty poor. By default the USB,
power/reset and front audio ports have their wires just routed over the
top of the 5.25" cage and dangling into the main chamber of the case.
Obviously this is no good, but the 5.25" bay is affixed to the roof, so
you can't merely push them out to the right hand side. I took the lazy
option of just bending one of the drive bay fixing brackets. I'll only
ever need one optical drive anyway and I wanted a clean fascia so it
won't interfere with anything.
That makes the case look a little better. If you take a look
at the next photo you'll see that the 5.25" bays are affixed to the
motherboard tray. This isn't a big deal in itself and lends some
solidity to the case, but it does affect cable routing options to any
optical drives. More on this later.
Next step was to remove the stock fans, they were okay but
since I already had a couple of better Yate Loons and a Scythe in the
house they couldn't compete. I also removed the 14cm fan in the roof.
My plan was to have as few fans in the build as possible, and couldn't
see the need for this one - I figure having a whacking great hole in
the roof would be sufficient for convection to do a sufficient cooling
job.
Once that was done I did a test fit of my motherboard, marked
up and cut some holes in the motherboard tray to help with cable
routing, and then I painted the chassis. I couldn't make up my mind
what colour to go for but in the end I decided to go with red. The
'theme' for the build was always going to incorporate black and red
because of the colour of my chosen motherboard and my Radeon graphics
cards. I was going to go for all-black, but then I bought some OCZ
ReaperX memory with the comedy oversized silver heatsinks, so I decided
to keep a silver theme to the cooling components instead of black. So
Silver, Red and Black was the final choice. It looks a bit garish at
first, but with both side panels and the front fascia on it doesn't
show through, so the effect is actually quite subtle (unless I fit a
window!)
Now onto the components. I got an Asus P5K-E wifi/AP
motherboard on clearance from dabs for just £32, which was a
steal as it's pretty much the ideal choice of motherboard for my needs
and the price was just too good to pass up. As previously stated I got
some OCZ ReaperX, it's the PC6400 stuff but I bought it as I needed it
in a hurry because my other ram corrupted and this was the only decent
stuff I could get locally. I read up on it online and all the reviews
and opinions said it'd run to 1000Mhz easily and as it turned out it
does so I'm really pleased with that purchase. Most other components
I'd be keeping from my old system - DVD, HDs, Phantom 500 and a pair of HD3850s.
Initially I was planning to transfer my Scythe Infinity, but
fitting it with a Thermalright bolt-through kit was an absolute
nightmare and due to the positioning of a couple of capacitors it'd
only fit onto the board in one orientation, which affected my
northrbridge heatsink (HR-05) and that in turn blocked the first ram
slot, so I went and bought a Thermalright Ultra120 Extreme, along with
a Xilence 120mm fan from ebuyer - the mounting bolts for the bolt
through kit still interfered with my northbridge heatsink, but as it's
a single central point of pressure for the mounting system, I was able
to angle it and still get good cooling.
Ignore the fan cable, this was just for testing purposes and it was
later shortened and sleeved.
Then it was time to start building.
First step with all major components in, but not cabled;
Next step was to get the cables in. Note that I put the
optical drive in the lowest bay, this was to minimise visible wiring
because I had to put all the cables under the 5.25" bays as previously
indicated - this was a bad point, but in a way it worked for me because
I'd tried routing the ATX cable through from the back of the board, but
it looked worse than having it come from behind the HD bays, so I just
folded the sata and power cables for the optical drive and cable tied
them to it. It's not super-neat, but it's an efficient use of space and
the best looking solution that I could get without making further cuts
to the case.
Next step was just a bit of tidying. Sleeving the PCI-E cable,
cable tying the PSU cables together and I also had to buy an 8-pin
power extension cable. I had tried routing the existing cable up behind
the motherboard, but the little visible section at the bottom of the
case was ugly, so I paid a couple of quid for an extension to keep
things neat looking at the front.
Then I received my new CPU - A Q9250. Yes, I typed that correctly, it's
a 12Mb 45nm Yorkfield quad core, but it's an Engineering Sample with a
low 6-7x multiplier. I bought it off ebay with a dodgy description, I
thought I was getting a Q9450, but this is capable of running 3.15Ghz
with a relatively low 1.2vcore, so I'm not too bothered. Fitting it was
a doddle because the TRUE is so thin. I didn't even need to take
anything out of the case, I just used a long screwdriver and got it in
easily.
Oh yes, it's lapped too.
The final step was the hard discs. I used an amalgamation of techniques
gleaned from SPCR and bought a length of W-section aluminium tubing
from B&Q (£4 btw) and cut it into lengths, drilled screwholes and fitted them onto my HDs to act as heatsinks, then soft mounted them on foam, wedging them into the space of the 3.5" bays with an interference fit to keep them steady. Results are impressive. They're easily as quiet as in my old setup where they were fully suspended with elastic, and temps are a good bit lower as well.
Note the switch for the cathode lights mounted low on the right hand side of the front bezel. Nicely tucked out of the way.
Final touches - I fitted a Scythe into the front intake position to feed cold air to the HDs, I had the Xilence mounted on the TRUE, and after some initial testing I fitted a Yate Loon into the side panel mount as the Phantom was getting too hot for comfort, so that's acting as an exhaust for the PSU and that keeps overall system temps down by nearly 10°C. All fans are running off the mobo headers, and I also have a Zalman resistor on the Yate Loon. All speeds are at their minimums.
My intention with this build wasn't silence, I've had 2 totally passive
systems in the past and I've come to the realisation that I don't
object to some gentle noise with my computing if it means temps are
kept down. I kept the stock coolers on my Radeons anyway so it would
have been pointless having the rest of the system running fanless.
Three 120mm fans might seem excessive by SPCR standards, but I
experimented with removing the front intake Scythe and it made very
little difference to overall noise levels so I put it back in for the
sake of reliability and longevity. I managed to kill one of my
Spinpoints last year and I put it down to excessive temps (pure
speculation, but I can't see any other reason for it other than pure
bad luck) so this time I want HD temps as low as possible.
In summary I'm very pleased with the way it's turned out. It's
certainly the neatest build I've ever done, and the only things I don't
like about it are the sleeving for the PCI-E and SATA cables as I
wasn't patient enough to braid them, but if it annoys me enough I can
always redo them at a later date. The HD mounts don't look too good,
but aside from this thread nobody's going to see them apart from me, so
I'm willing to live with it for now. In time I might source some denser
foam (camera foam on ebay is pretty cheap) and do a neater job, but the
waffle foam I've used is perfectly secure and from a side view it's not
visible anyway. The system is significantly more powerful than my old
setup, everything runs cooler and it's just as quiet when not idling, so
overall the work was a success.
Still to do is a side window. I put two red cathodes into the
case in readiness, but I'm going to get a light activated mirror panel
and cut it to shape around the side vent, so I'll need to take my time
on that one to keep things neat and not mess up the good work I've
already done. I also need to refit my second graphics card, it's
currently in service on my second PC, so when I get around to replacing
it I'll reinstall it into this build. No rush though.