My freshly cooled hard drives! (pics)

The alternative to direct air cooling

Moderators: NeilBlanchard, Ralf Hutter, sthayashi, Lawrence Lee

Post Reply
wussboy
Posts: 635
Joined: Wed Oct 23, 2002 12:34 pm
Location: Southampton, UK

My freshly cooled hard drives! (pics)

Post by wussboy » Fri Sep 03, 2004 5:40 pm

Hey everyone. I have been wanting to watercool my hard drives for some time now, and finally got around to buying some slabs of copper and learning how to solder. I figured I’d post some pics and do a short little write up. Enjoy!

Image
The case as it was.

Image
Some parts.

Image
I blow at soldering. It’s a good thing steel wool cleans it up nice.

Image
The finished product.

Image
Pressure testing is fun!
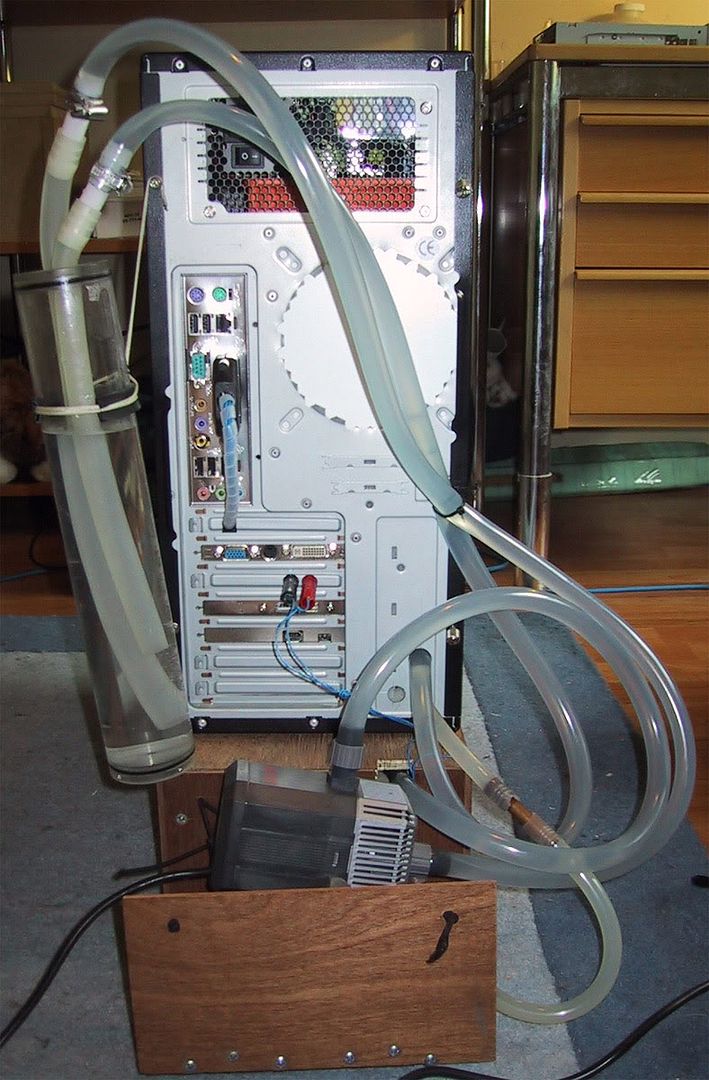
Image
Assembled.

Image
The rubber strap was a last minute thought, but a good one, I think.

Image
I took the opportunity to duct my PSU out the back.

On the whole, I’m pretty happy. My HD temps dropped by 10-15C and idle noise is absent, although seek noise is slightly louder (the were mounted the standard way in an Antec BQE). I had a small leak when I first re-assembled it, but I got it sorted out at the cost of my WAN card. That’s okay. It sucked anyways.

I may cover the HDs with something more to quiet them further later. I'm happy to answer any questions that anyone might have.

1911user
Posts: 109
Joined: Sat Mar 13, 2004 12:08 pm
Location: Oklahoma

Post by 1911user » Fri Sep 03, 2004 6:36 pm

Very nice!

Lots of $$$ in copper unless you had some scrap material. I would have been tempted to use aluminum plate and epoxy (jbweld) to attach the copper tubing. My bad soldering skills wouldn't be quite as challenged that way. Corrosion shouldn't be a problem if moisture isn't present, I think. Nice job. It would be good for reference if you listed the sizes of tubing, barbs, plates, etc. used in contruction.

zoob
*Lifetime Patron*
Posts: 380
Joined: Tue Apr 13, 2004 7:12 pm
Location: Toronto, ON
Contact:

Post by zoob » Fri Sep 03, 2004 6:37 pm

Nice work! Maybe you could add some hooks to the front side of the unit so that the hard drives can sit a little more level. Did you enable AAM on the drives?

Careful with the lack of airflow over your mosfets and NB..

wussboy
Posts: 635
Joined: Wed Oct 23, 2002 12:34 pm
Location: Southampton, UK

Post by wussboy » Fri Sep 03, 2004 7:50 pm

The copper was $30 CAD, which I thought was pretty good. The pipes are 1/2" and the brass barb was selected to fit my 3/8" ID tubing. I thought about aluminum, it sure would have been easier to find, but I didn't know how to stick them together. :(

With all the connectors attached it sits much more level. What is AAM?

As there is now NO airflow in my case, the side is staying off for now. I'm contemplating cutting a couple of convection ducts (one in the top and one in the bottom) later. I'm open to other ideas as well!

Gooserider
Posts: 587
Joined: Fri Aug 01, 2003 10:45 pm
Location: North Billerica, MA, USA
Contact:

Post by Gooserider » Tue Sep 07, 2004 7:43 pm

Nice job, however I would be concerned about trapping air in those big upright sections. Long as it works though, that's the big thing.

(To avoid the air trap potential, I'd probably have run the pipes crosswise instead of vertically, with a few more passes of tubing. I either would have done a split plumbing setup with a branch on each side plate, or done a couple of rounds of crossover tubes so that the loop 'stairstepped' up the plates.)

Gooserider

wussboy
Posts: 635
Joined: Wed Oct 23, 2002 12:34 pm
Location: Southampton, UK

Post by wussboy » Sun Sep 12, 2004 9:53 am

Even though I now have a closed loop, I did run it into a big reservoir for 12 hours or so, and several times I twisted the block every which way to make sure that there were no bubbles in it. So far so good. My system is quiet enough now that I can instantly hear if bubbles go through the pump. Next weekend I'll start on my crowning achievement and build a new reservoir that should deal with any remaining bubbles. Weeee! :)

Qwertyiopisme
Posts: 237
Joined: Tue Nov 11, 2003 6:48 am
Location: Gothenburg, Sweden
Contact:

Post by Qwertyiopisme » Sun Sep 12, 2004 10:35 am

You can build a resevior like mine:

Image

Where water comes in vie the upper pipe and gets sucked out through the lower one.

(the resevior was actualyl really easy to make, just some acrylic pipe and some turned endcaps with O-ring gaskets and some vaseline! :D

wussboy
Posts: 635
Joined: Wed Oct 23, 2002 12:34 pm
Location: Southampton, UK

Post by wussboy » Sun Sep 12, 2004 6:31 pm

You don't have a radiator, eh? That looks pretty effective. I have been making plans for my own for months now...it will be...overkill. But that's the way I like it!

Post Reply